How to Embed WordPress iFrame Code on Your Website

If you’ve ever visited a blog post or page, chances are, you might have come across a content piece that includes images and videos from other sources.If that is indeed the case, then you might have wondered whether or not it fell under the category of copyright infringement.
The problem is that it is valid. WordPress websites all across the board use embedded media instead of uploading regular content because it consumes fewer resources while adding to the user experience.
To embed external content in this manner, the webmaster uses an HTML tag called iFrame. In this post, we’ll look at what that is and how you can add it to your WordPress website with or without a plugin.
What is an iFrame?
Essentially speaking, WordPress iFrames are a medium through which you display external content on your website without fearing copyright strikes or content theft.
Used on every web page and website, iFrames consume fewer resources and are an excellent way to include videos and other media types effectively.
Let’s demonstrate how they work through an example. Suppose you have a YouTube video that you want your readers to watch before reading a blog post on your website. By using an iFrame, you can embed that video at the very beginning of the content. Simple!
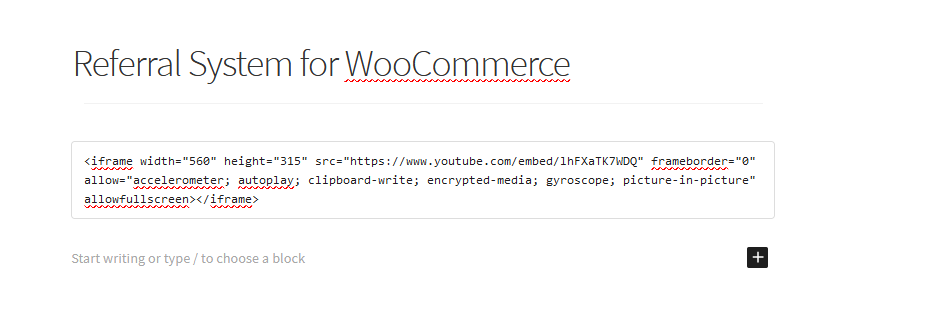
All you have to is embed the URL of the YouTube video inside the blog editor. When you publish the blog post, you will see the video showing up where you inserted it within the code editor.
Embedding Visual Content using WordPress iFrames
If you want to embed audio and visual media, then you should use iFrames. Not only can you embed them quickly, but you can also preview the content right from the WordPress post editor.
With this, cross-platform content sharing becomes more straightforward and effective. In the next few steps, we’ll show how you can embed iFrames in WordPress.
Embedding WordPress iFrames Without a Plugin
The process is a lot easier than you’d imagine.
The first thing you can do is to embed the iFrame code through the HTML. That’s the traditional method, and it goes something like this:
Select the URL of the webpage you want to add to the iFrame.
Use the custom HTML <iFrame></iFrame> code tag to add the iFrame in WordPress.
At the basic level, this is what your code looks like:
<iframe src="your_webpage_url"> </iframe>
If you wish to add more information to your content, then you can define parameters inside the iFrame tag. The following is an example of an iFrame tag with all the parameters:
<iFrame src="https://wordpress.org/plugins/" width="50px" height="300px" frameborder="1" scrolling="yes" align="left"> </iFrame>
This is what the content looks like inside of the WordPress Gutenberg editor:

When you preview inside the content, it will show this result.

Regardless of whether they’re audio, video, or other visual content, you can use the iFrame to add the media in this manner.
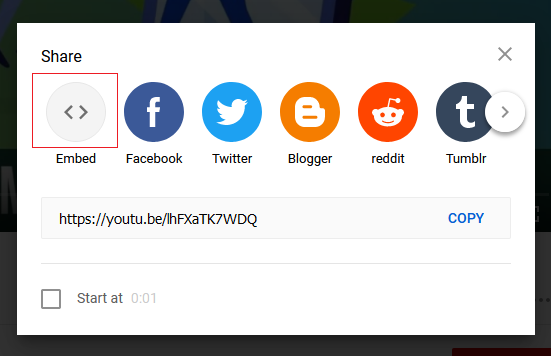
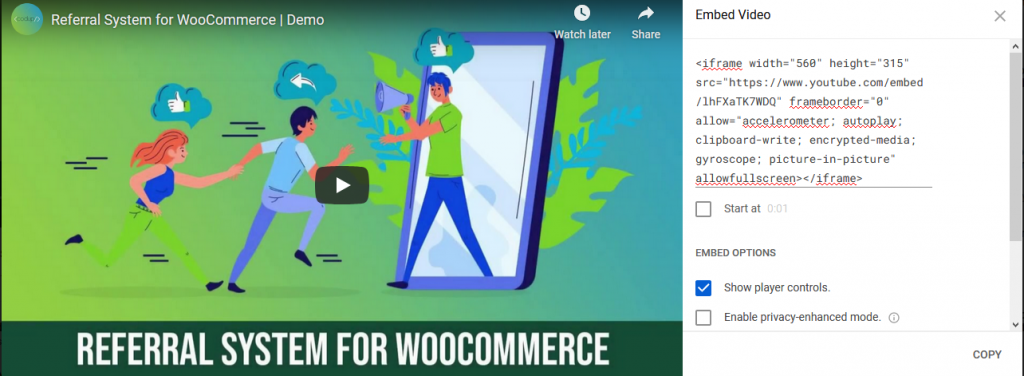
You might have seen the embed feature on YouTube videos. That’s present to provide you with the embed code. Just click on Share > Embed and copy the URL to your site.
Following this process, you should be able to embed any page on your posts easily. Whether it’s images, visual content, audio, or more.
Furthermore, content websites such as YouTube have an in-built embedding feature for you to share the content. Click on Share and Embed and copy the given URL as demonstrated above.

Embedding iFrames using Plugins
Plugins add the necessary functionality to your WordPress process. There are plenty of iFrame plugins on WordPress, and while they all perform the same functions, there are specific plugins that are better than others.
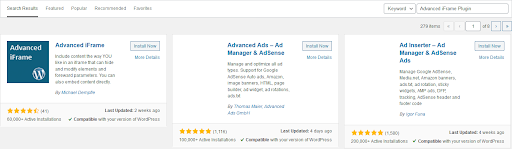
For this tutorial, we’ll be using the Advanced iFrame Plugin.

The plugin is highly intuitive – allowing you to not only add regular iFrames. Not only that, but it also allows you to create separate customized shortcodes. On top of that, it has a UI that lets you create iFrame shortcodes with relative ease.
To add an iFrame to your content, you first have to install the plugin. From your WordPress dashboard, go to Plugins and in the search box, type in Advanced iFrame Plugin. When you’ve found it, install and activate the plugin.
Now, you can use this plugin in two ways:
- Directly through the shortcode.
- Through the User Interface (UI).
Let’s see how the plugin can prove useful in both ways:
- Directly through the shortcode.
The direct method is relatively simple in that it follows the same process as the iFrame HTML tag. The only difference is that we use a shortcode in this one.
When you’ve installed the plugin, you should be able to view the “Add Advanced iFrame” button. All you have to do is click on the shortcode button and just inset a default shortcode inside the editor.
If you don’t change the settings, you will see a change like this.
[advanced_iFrame src="//www.tinywebgallery.com" width="100%" height="600"]
Now, you can change the default URL by visiting the settings UI, but we’ll elaborate more on that later. We’ll only be altering the URL of the iFrame HTML tag for now.
There are plenty of parameters that you can use within the iFrame tag to add more functionality to it. You can change the Width/Height, scrolling values, frame borders, margins, and transparency. All of these can prove highly useful in adding depth to your content display.
If we were to view the iFrame tag with the parameters discussed, it would look something like this:
[advanced_iFrame src="https://themegrill.com" width="500px" height = "500px" frameborder="1" scrolling="no"&amp;amp;amp;amp;amp;amp;amp;amp;amp;amp;amp;amp;amp;amp;amp;amp;amp;nbsp;allowtransparency=”yes”]
If you’re a beginner, you don’t need to worry about what the display would look like. Just know that with the advanced iFrame plugin you can create a plugin with relative ease.
In the next section, we’ll be making things a lot easier for you by explaining how you can add iFrame on WordPress without touching a single piece of code.
- By using the settings user interface:
For non-technical users, touching the WordPress code can be rather tricky. When it comes to creating iFrames, handling code, adding the right parameters – all with the expectation that it would not break is a daunting process.
The best part about the Advanced iFrame plugin is that it eliminates the need for typing code. All you have to do is access the UI of the plugin to set up an iFrame.
First, click on the Advanced iFrame listing on the dashboard and direct yourself to the necessary settings. This is the menu where you will be doing most of your work.
Now, there are plenty of parameters present within the UI. However, we will only be pointing out the essential ones.
- URL: Inserts the URL of the webpage you want to connect with the iFrame. The plugin checks if the URL is valid or not.
- Width/Height: Adjusts the width and height of the iFrame. You can use percentages or pixels, depending on your requirement.
- Margin Width/Height: Adjusts the height and width of the iFrame box.
- Frame border: Adds, removes or adjusts the frame border. To remove it, set the value to “0”.
- Transparency: Sets the value to “yes” and “no,” allowing you to alter your box’s clarity.
- Full Screen: Allows you to set whether or not you want your users to view the iFrame content in full screen.
With these settings, you can easily create an iFrame window. Now there are plenty of other features with the plugin that let you add more value to your iFrame. We didn’t talk about them in this post since they are pretty complicated, to begin with.
When you are done setting up the plugin, all you have to do is click on “Generate Shortcode.”
Click on ‘Generate a shortcode‘ once you are satisfied with the current settings. It generates a customized shortcode that you can copy and paste into your WordPress.
Conclusion
This post discussed how you could embed an iFrame on WordPress with and without a plugin. iFrames are a fantastic way to embed content on WordPress without worrying about copyright infringement. Moreover, they help you add more visual value to your written content without consuming too many website resources.
If you were looking to embed an iFrame on your WordPress site, we hope this article proved valuable to you. Thanks for reading!
Read Also
- How to Add a Favicon to Your WordPress Website
- How to Fix the WordPress HTTP Error
- How To Update PHP Version In WordPress
- Detecting WordPress Themes with ‘WhatWPThemeIsThat’
- How to Add Booking Filters In WooCommerce Bookings Site