How To Edit Footer In WordPress And Customize It The Way You Want

Teaser: This post will walk you through the process of how to edit footer in WordPress so you can customize it the way you want and personalize it for your very own brand.
So, you’ve finally powered up your WordPress website. It’s coming together really nicely. The design, content, and layout are all perfect.
You’re ready to take on the digital world with confidence!
You scroll through your website from header to footer to see how good it looks. Then you come across a strange piece of content at the footer that either credits the theme developer or has the oft-dreaded “powered by WordPress” text on it.
It’s frustrating to see that, we know. Even if you did install the theme from WordPress, you’re the one who spent the time and resources in customizing the theme according to your brand.
But can that footer be removed or replaced with more personalized content? The answer is a resounding YES.
In this article, we’re going to run you through the two methods of how to edit footer in WordPress and remove those credits on your site. To give more personalization to your website, we won’t remove the “powered by WordPress” text but instead, replace it with something more relevant to your brand.
But before we begin, there is one confusion that we need to clear up.
Removing/Editing Footers in WordPress: Is It Legal?
This is where most people get confused. Yes, it’s absolutely legal to edit the footer credits. Don’t worry; you won’t get into any trouble for making the changes.
Why? Because WordPress is an open-source CMS distributed through the GNU GPL (General Public License). Similar to the Linux platform (with its variety of flavors), you have the right to use, modify, and redistribute in any way you like.
In extension, all the themes present within the WordPress official theme store are covered by the same license. This makes theme editing a totally legal procedure.
The last thing we would like to point out is that because it is open-source, WordPress has spawned an entire development service industry.
To ensure that you’re availing bespoke WordPress development services, go for a service that promises flexibility, security, and attention-to-detail in every aspect of the WordPress development process.
With that misconception out of the way, it’s time we jump into the meat of the subject.
The Two Universal Methods of How to Edit Footer in WordPress
So, let’s go about editing the footer of our WordPress website. In this article, we’ll be going through two different methods you can use to edit the footer.
Depending on your level of expertise, you might prefer one over another. Either way, we’ll be editing this section of the website as illustrated below:

This is the Nexas theme available for free on the WordPress official theme store.
For business owners, as is clearly evident, such a footer is counterintuitive to their branding efforts. Let’s look at the first method on how to edit the footer in WordPress.
Editing Through the Search and Replace Method
For this section, you will need the help of two WordPress plugins:
Once you’ve downloaded the two, keep them. We’ll be needing them later. For now, head on over to the front-end of your site, and press Ctrl + U if you’re using Chrome or Firefox, or Command + Option + U if you’re using Safari. This command opens up the source code for your page. It will look somewhat like this:
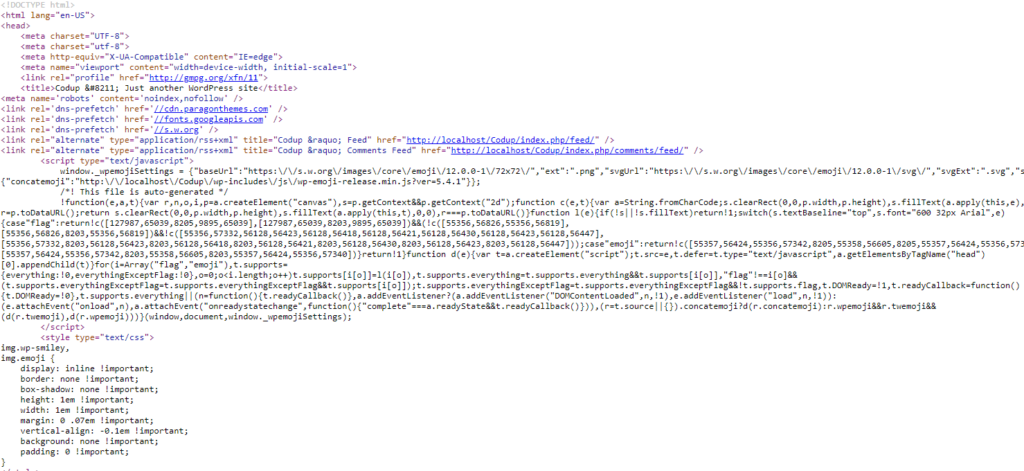
Now, press Ctrl + F and find the text you would be replacing. For this example, we will be removing this entire section and replacing it with its associated links with our own brand name.

Here we will press Ctrl + F and search for the words “Proudly powered by WordPress…”. Once we have found it, simply copy the code as we’ve done here.

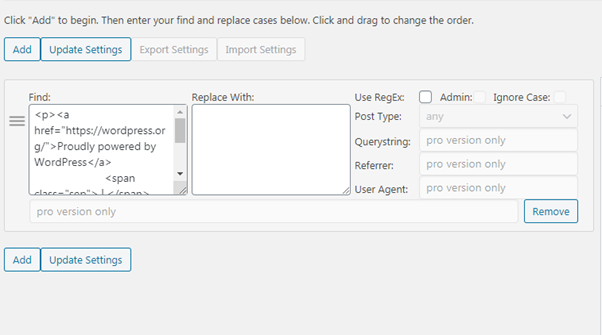
Now, visit the Real-Time Find and Replace plugin by navigating to Tools > Real-Time Find and Replace.

When you’re inside the plugin settings, click on Add and just paste all the source code you’ve copied above in the “Find” field.
Head on back to your Dashboard, and from there, go to Pages > Add New. We will write about our brand and link it to the associated web address in the text field.
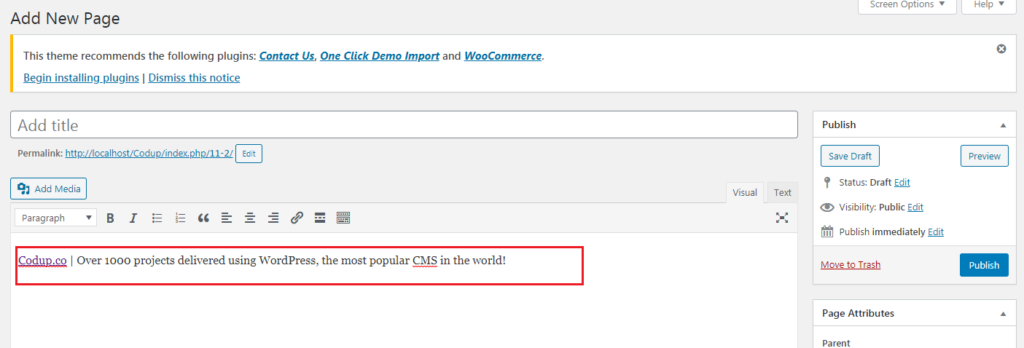
This will be our footer content. Now, head on over the “Text” tab at the top right of the editor.

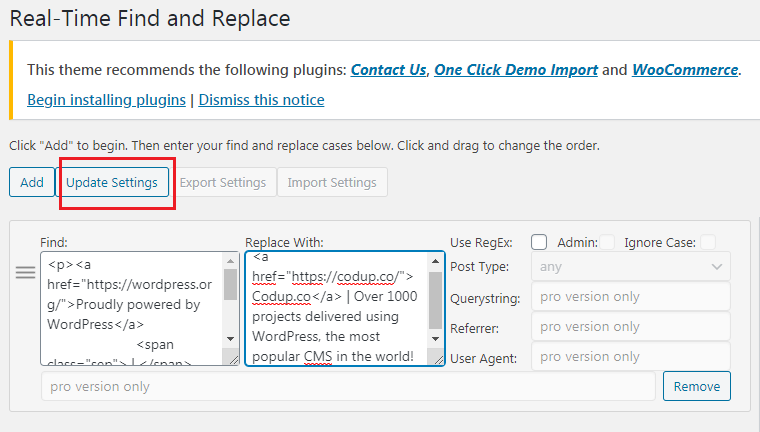
Now, copy the source code version of this text and paste it onto the Real-Time Find and Replace plugin as we have done here. Once you’ve pasted it correctly, click on Update Settings.
Now, if you go over to your footer at the front-end, you will find that it’s changed to what we’ve wanted.

And there you have it, we have successfully personalized our footer according to our preferences. This search and replace method can work on all themes and for non-techies, this is the best way to remove the annoying footer content.
However, if you’re a developer wanting to dive deeper into the WordPress theme editor, then the next section will prove beneficial to you.
Editing Through the Theme Files
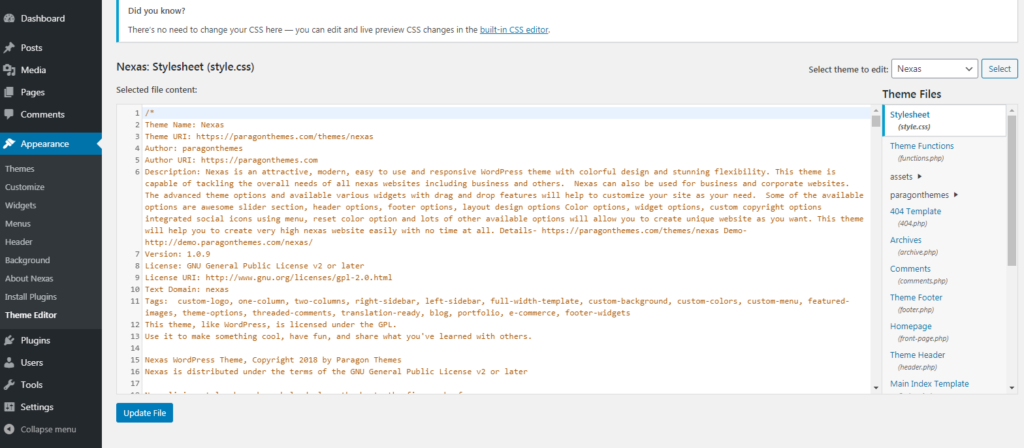
Visit your WordPress dashboard, and from there navigate to Appearance > Theme Editor.

Once you click on Theme Editor, you will be directed to the ‘hood’ of your WordPress site. Upon entering, you will see the following message:
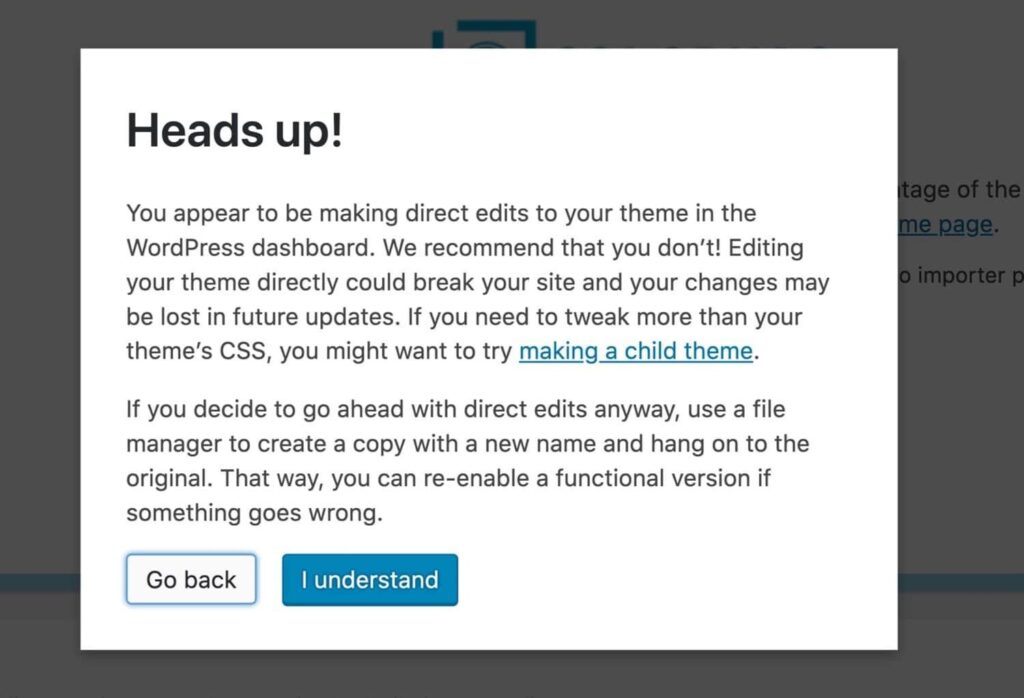
If you want to edit your theme in this manner, then click on “I understand” to continue. In this section, we will carefully back up the code files in a Code Editor or Notepad document to ensure that you don’t break anything.
Once you’ve clicked through this pop-up, this is the default theme editor layout that you will see.
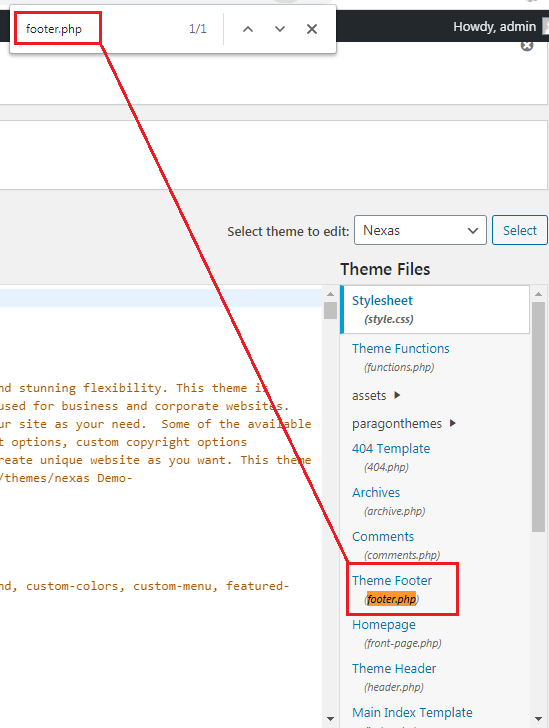
To find the footer files in the editor, click on Ctrl + F and type “footer.php”. Click on the Theme Footer link to continue:
On the Theme Footer section, you will find lots of PHP code. To create a backup in the event, you break something, open up a Notepad file or create a PHP file on your code editor, copy the entire code from this section and paste it on to your choice of editor.
The following is an example of what the copied code looks like on a Notepad document.
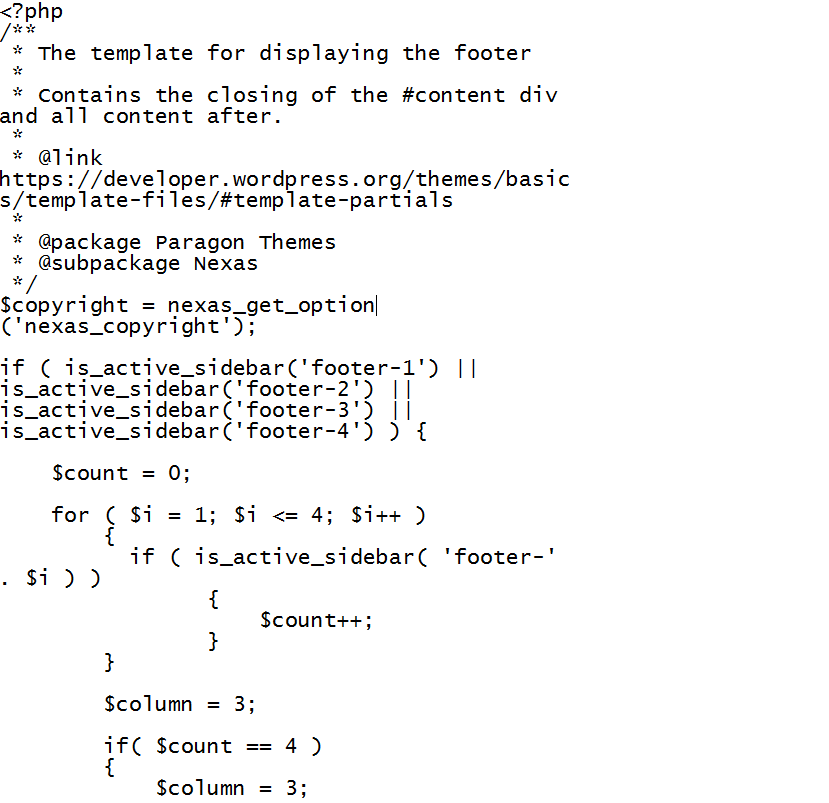
We’ve used a code-editor like Notepad++ to show you how the copied code would look like there.

Now, go back to the front-end, and see what you want to edit.

From this footer, we want to perform the following actions.
- Remove the “powered by WordPress” text and replace it with a “codup.co” link
- Replace the “Theme: Nexus by Paragon Themes” text with a text that says, “Over 1000 projects delivered using WordPress, the most popular CMS in the world!”
To accomplish this, visit the Theme Footer section again and within the text field, press Ctrl + F.
Once you give the command, the browser will prompt a search field at the top left of the editor that will look something like this:
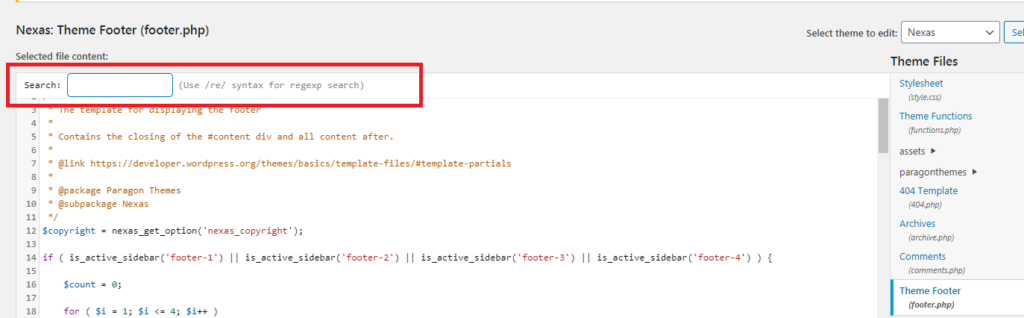
Within the search field, either type or copy/paste the text you want to replace. In the image below, we’ve entered the word “Proudly powered” into the search field and it shows us the results.
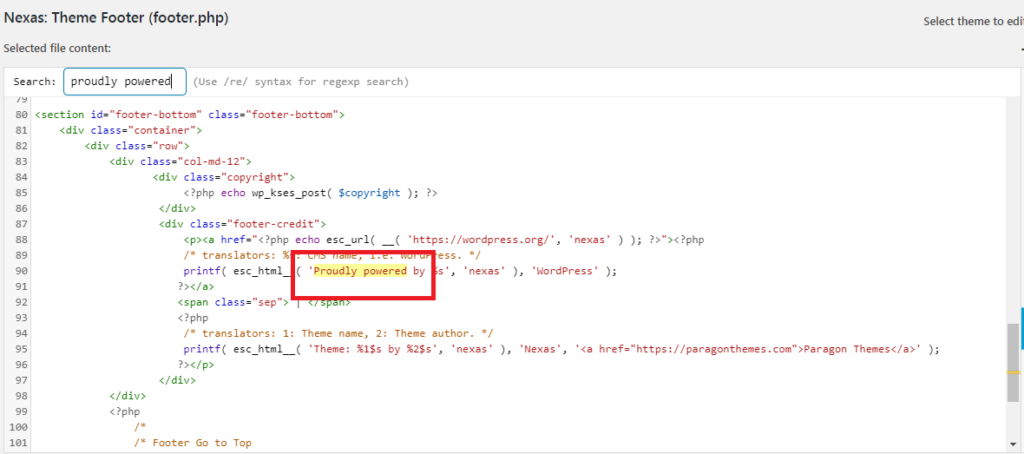
Now, let’s change the entire text to “codup.co”. Select the entire field, minus the quotations, as shown below.

Remove it, and write “codup.co” in place of “Proudly powered by” like this.

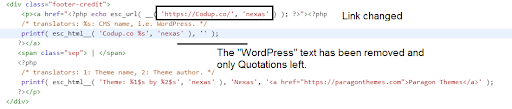
Now, we will replace the link above with our own link and remove the text that says “WordPress”. Only leave the quotations marks as they are like this:
Then click on the Update File button outside the editor.
Now visit the footer at the front-end of your site, and check whether or not the changes are there.

Voila! We’ve completed the first edit. Now, it’s time to move on to the next phase. In the Theme Footer, search for the word “Theme”.
Alternatively, you can manually search similar words within the code.
Here is the footer code that we need to change:

Copy the entire content from and replace it with the following code:
printf( esc_html__(“Over 1000 projects delivered using WordPress,
the most popular CMS in the world! “));
This will overwrite the previous with the new one. In the editor, the text will look something like this:

Click on Update File again, and visit the front-end to see our edits in action.

And there you have it. We’ve successfully, albeit at the basic level, edited our WordPress footer to our own brand. You can edit the theme code for your site in a similar manner.
Just be careful that things could get really messy if you’re not proficient or knowledgeable about code. For budding developers looking to enter into the world of WordPress theme development, this is a great way to start getting some hands-on experience.
Conclusion
You can see how the two methods described above are strikingly different. Both achieve the same thing but in totally different ways. This is what makes WordPress so interesting. It’s a powerful platform for both developers and non-techies.
So, no matter what level of expertise you have, we hope you were able to remove/edit your footer credits.
Read more WordPress tutorials:
- How to Create a Dropdown Menu in WordPress – Very Simple Method!
- How to Add PayPal Donate Button to WordPress
- How to Delete a WordPress Theme – Very Simple Method!
- How to Embed iFrame Code on Your WordPress Site
- How to Add a Favicon to Your WordPress Website

Tooba Nadeem
Tooba Nadeem is an experienced technical writer with 5 years of expertise in technical writing. Her extensive research and knowledge enable her to provide comprehensive insights into various interesting topics. She excels at presenting complex information in simplified language, ensuring clarity for the audience.